A Taylor soft serve machine is designed for consistent performance and reliability, but like all foodservice equipment, it needs regular maintenance. Ignoring worn-out parts can lead to poor product texture, messy leaks, machine failure, and even food safety risks.
The good news? Replacing soft serve machine parts is easier than most operators think, especially with the right process and tools. This guide walks you through how to identify, replace, and maintain key components in your Taylor machine to keep it running like new.
Common Signs Your Taylor Machine Needs New Parts
Before components fail completely, they often give warning signs. Watch for:
- Inconsistent texture (too soft, too icy, or grainy)
- Product leakage around the door or beater shaft
- Excessive vibration or unusual noise
- Frequent shutdowns or error messages
- Longer-than-normal freezing cycles
These issues typically indicate problems with:
- O-rings and seals
- Scraper blades
- Beater shaft seals
- Door gaskets
- Drive belts
Step-by-Step: Replacing Worn Parts in a Taylor Soft Serve Machine
1. Power Down and Disconnect
- Turn off and unplug the machine.
- Follow standard lockout/tagout procedures to prevent accidental startup.
2. Empty, Clean, and Disassemble
- Drain the mix from the hopper.
- Run a rinse cycle.
- Disassemble all removable components.
- Clean and sanitize each part thoroughly before inspection.
3. Inspect and Identify Worn Components
Look for the following wear indicators:
| Part | Signs of Wear |
| O-rings & gaskets | Cracks, stiffness, or flat spots |
| Scraper blades | Rounded edges or chipping |
| Shaft seals | Swelling or signs of leakage |
| Door gaskets | Flattened or hardened rubber |
| Drive belts | Fraying, slack, or cracking |
Tip: Keep a spare parts kit on-site to reduce downtime during busy hours.
4. Install the Replacement Parts
- Use Taylor-approved lubricant on all seals and o-rings.
- Replace each part one at a time using the manufacturer’s manual or parts diagram.
- Double-check fit and orientation to avoid cross-threading or misalignment.
5. Reassemble and Run a Test
- Reassemble the machine carefully in reverse order.
- Plug in and power on.
- Run a test cycle with water before adding the product.
- Watch for leaks, unusual noises, or performance issues.
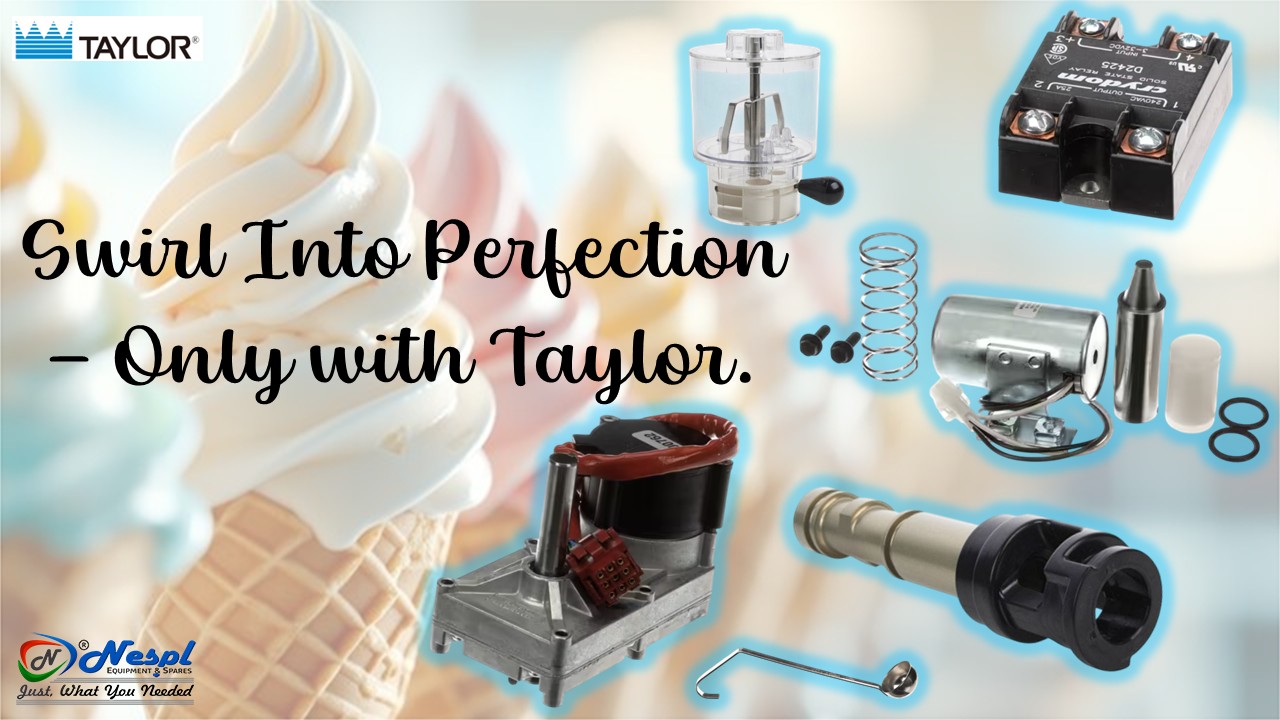
Where to Buy Genuine Taylor Replacement Parts
Using authentic, food-safe parts is critical for health, safety, and equipment performance. At NESPL, we offer a complete range of OEM and compatible replacement parts for Taylor soft serve machines, including:
- Scraper and beater blades
- Hopper and door seals
- Beater shaft kits
- Mix feed tubes
- Drive belts and motors
- Complete tune-up kits
Need help identifying a part? We’ve got you covered with diagrams, expert support, and fast shipping. Reach us at: sales3@natronequipments.com
Pro Tips to Extend Your Machine’s Lifespan
- Clean the machine daily and sanitize thoroughly.
- Inspect soft parts weekly, especially in high-usage settings.
- Replace o-rings, gaskets, and scraper blades every 3 to 6 months, or as needed.
- Train staff on proper assembly/disassembly and maintenance techniques.
- Keep a maintenance log to track replacements and service dates.
Final Thoughts
Your Taylor soft serve machine is a core part of your business, and routine maintenance keeps it that way. Replacing worn-out parts on time prevents costly breakdowns, keeps your product consistent, and ensures a safe, smooth operation.
Don’t wait until something breaks. Stay ahead of maintenance and keep spare parts on hand.
Need support or help finding the right replacement part? Contact NESPL today , we’ll help you find the exact part you need, fast.